Showing posts with label Instruction Sets For Kids. Show all posts

Saturday, August 23, 2008

Homemaking Tip: Instructions for kids on how to clean your kitchen after dinner. (For real this time.)

I am pleased to list this post @...


...an awesome weekly carnival that inspires one to complete that one pesky project sitting on the back burner. For more tackle-its, click the pic!

I have finally tackled coming up with a step-by-step instruction set for my kids to use when they clean the kitchen. This prevents me from having to say..."Did you clean out the sink? Did you sweep the floor? Did you wipe off the stove?" They can simply go to this post and follow it step-by-step. This may or may now work for your family as we are all different, but you could certainly devise a plan like this that works for you. If you have any suggestions for improving the routine, by all means, please post a comment! Also, I would like to give a special thanks to Claire, age 6, for being the model in our photo shoots. Not only did she cheerfully cooperate, she cleaned the entire kitchen as she went! (less one half bottle of Dawn dish soap). Thanks, Little Lady of mine!

Step 1: Put away any dishes that might have been left out to dry in the dishrack on the counter.


Step 2: If there are any dishes in the sink, put them on the counter by the sink, but opposite the dishwasher.

Step 3: Fill both sides of the sink with warm, soapy water. (Remember that just two or three drops of dish soap will do the trick!)


Step 4: Clear off a space large enough for a hand towel on the counter above the dishwasher. Place a dry, clean hand towel in this space because you will later be placing the dishes you've handwashed here.


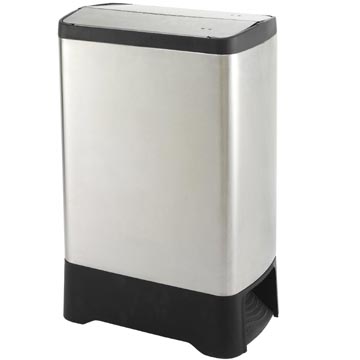
Step 5: Clear off the table, making sure to put the food in plastic containers or ziploc bags. Scrape the food left on the dishes into the trashcan, then place them carefully in the sink filled with soapy water on the side furthest from the dishwasher.


Step 6: With a clean rag, wipe down the table, using your hand, a dish or the trashcan to catch crumbs and food particles.


Step 7: Clear off the counter, following the same details as in Step 6.


Step 8: Spritz the counters and stove with water so that any stuck-on food can begin to soften for easier cleaning.


Step 9: Begin rinsing the dishes by grabbing a dish, rinsing it with a rag or scrubby sponge in the side of the sink closest to the dishwasher, and placing the dishes neatly in the dishwasher. It's best if you can focus on putting all the plates and other items that go on the the bottom in first, then you are not having to open and close the top rack so many times. Next, load the glasses and other top-rack items, then the silverware.


Step 10: Hand wash any dishes that won't fit in the dishwasher and leave them upside down on the hand towel or dish rack. If the food is too stuck-on, you may fill the dish with water and leave it to soak for a while.

Step 11: Wipe down the counters and the stove with a rag, or, if necessary, a scrubby sponge.


Step 12: Quickly wipe down the outside of the fridge, dishwasher, microwave and oven with a damp rag.


Step 13: Clean the sink, making sure to get behind the sink next to the wall, the faucet and around the rim of the sink, where it touches the countertops.


Step 14: Sweep the floor, making sure to get under the trashcan and under the kitchen chairs.


Step 15: Put dishwasher soap in the dishwasher and turn it on.

Step 16: Mop the floor, again making sure to get under the trashcan and under the chairs. Start from the corner furthest away from the kitchen's exit and back out as you mop. This way, you don't have to walk over the newly-mopped floor.


Step 17: Stand at the entrance, admire your work, come tell me you are done and be happy, like Claire, because you did a great job!


THANK YOU FOR YOUR HELP! :)

Saturday, July 19, 2008

Homemaking Tip: How to fold a fitted sheet


This post is listed at Tackle-It Tuesday. Click the pic to check out this awesome new carnival!


Today, we will tackle one of homemaking's most challenging aspects: FOLDING FITTED SHEETS. My beautiful cousin-in-law, Ayrel, requested that I do this how-to post, so HOWDY, Ayrel!

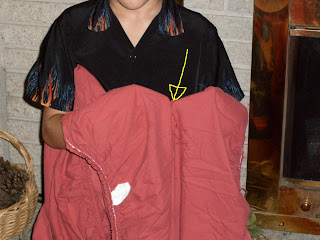
I have to admit that I didn't actually learn how to fold fitted sheets until a year after I was married. (It's true, Mom. You never taught me.) I learned how to do this from a homemaking expert on the Today Show while my little family of three was living in Germany. The only channel we received was AFN, the Armed Forced Network, so our television viewing was limited, but at least I can say I took this away from it all. Let me add here a thanks to our model, eight-year-old Landon. He was very excited to pose for this post, but as I was attending crying babies between shoots, his arms began to weaken as he held the sheet in the varying poses, thus explaining some of the facial expressions. Thank you, Landon, for being so patient!


Step 1: With the right side of the sheet facing you (that is the side that will eventually be "up" on the bed), place the tips of your fingers into the pockets of the sheet, so that your third finger is at the tip of each seam.

Step 2: Touch the tips of your third fingers to each other, while still in the pockets.


Step 3: Lift the left hand pocket and place it over the right hand pocket.


Step 4: Make it nice and smooth.


Step 5: You will now have a double pocket, with the seams inward. Place this part in your left hand, and put your fingertips into the pocket again, just like before, except this time it will be a double pocket instead of single one. With your right hand, line up the other side of the sheet to get ready for a repeat of the pocket overlapping.


Step 6: Now, so that you will have both of your hands available for the next part, tuck in the finished double pocket under your right arm.


Step 7: Repeat Step 2 with this side of the sheet.


Step 8: Repeat Steps 3 and 4. Notice how Landon still has the first side under his right arm, being safely protected from unfolding.


Step 9: Now hold out both double pockets with your middle fingers at the ends of the seams, as before, but this time, you will have TWO double pockets.


Step 10: Repeat Step 2 again, with the two double pockets.


Step 11: Repeat Steps 3 and 4 again.


Step 12: For the next step, lay the sheet, now folded in fourths, on a flat surface. Fold down the open edge (opposite you) so that it is even with the 45-degree angle seam on the right.


Step 13: Repeat this process with the open edge on the right side, again making sure that the open side nearest you is even with the 45-degree angle seam.


Step 14: Now grab the side nearest you and bring it up to the side opposite you, folding it in half.


Step 15. Repeat Step 14, folding it in half again.


Step 16: Next, with your left hand in Karate Kid stance, place it in the middle of the sheet and with your right hand, grab the left side and fold it over your hand, to the right. This maneuver ensures that no excess fabric will bunch up in the middle, preventing a flat finished product.


Step 17: Do one more smoothing and you are finished!


Now, I know these 17 steps seem complicated, and perhaps even grueling, but trust me, with diligent practice you can get your folding time down to under one minute. I timed myself this morning and clocked in at 58 seconds. Happy folding!


P.S. I know that the worded explanations were a bit confusing, but hopefully the photos and yellow arrows did the trick. If it's too confusing, let me know!

Sunday, July 6, 2008

Homemaking Tip o' the Day: Instructions for kids on how to thoroughly clean a bathroom

Here's another step-by-step instruction set for kids on how to thoroughly clean a bathroom.

THE DRY CLEANING:

Step 1: Spray the shower walls and bathtub with cleaner.


Step 2: Take out the trash.


Step 3: Shake the rugs outside.


Step 4: Move the step stool, scale and trashcan out of the room.


Step 5: Pick up and put away everything on the bathroom floor.


Step 6: Put everything in it's home from the counter and over-the-toilet shelf.


Step 7: Dust the over-the-toilet shelf and everything on it.


Step 8: With a dry paper towel or dry rag, wipe down the sink, then the toilet. Using a dry one enables you to more easily clean up dust or stray hairs.


Step 9: Sweep the floor, including behind the toilet.

(Again, a really long broom!)

THE WET CLEANING:

Step 10: Spray sink, counter and toilet with cleaner.


Step 11: With a damp rag, thoroughly clean counter, sink and faucet.


Step 12: Windex a paper towel and clean the mirror of all spots and streaks. It's best not to spray the Windex directly on the mirror as it can get between the glass and the wood and cause the wood to warp and bend.

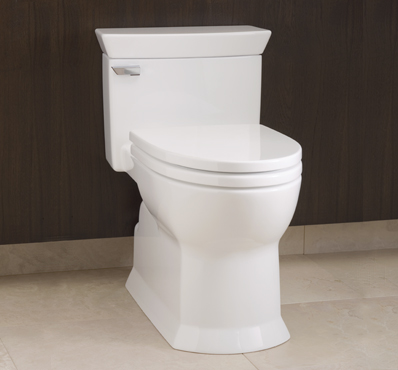
Step 13: Pour 1/2 cup of baking soda and 1/2 cup vinegar in toilet. Use the toilet brush to scrub the inside of the toilet, including under the rim.


Step 14: With a damp rag, clean the entire outside of the toilet, starting with the top of the toilet, the tank, the seat lid, the seat, the top of the bowl, the outside of the bowl, and the base, where the toilet meets the floor.


Step 15: With a clean damp rag, clean the flush handle.


Step 16: With a damp rag (but not the same one you used for the toilet) or, if necessary, a scrubby sponge, clean the shower walls, bathtub and faucets. Rinse with the shower sprayer.


Step 17: Mop the floor, remembering to get behind the toilet.


Step 18: Wipe down the step stool, scale and trashcan.


Step 19: After floor has dried, return step stool, scale and trashcan to their original locations.

Step 20: Return the rugs to their original locations.


Step 21: Stand in the bathroom doorway and admire your work (so you can stand proud like this man), then come tell me you are finished.


THANK YOU!

Wednesday, July 2, 2008

Homemaking Tip o' the Day: Instructions for kids on how to clean a family or living room

Unexpectedly, it seems as though my posts about kids' chores are popular with many readers....so here goes another one.

My kids have lots of chores. In turn, I have often found myself nagging them to get it done and pointing out everything they missed. This became frustrating to both them and me, so recently I developed a plan that would benefit all of us. I wrote a very specific step-by-step, how-to clean list for every room. Picture prompts (such as the ones in this post) help small children, and serve as visual reminders to older children. When they feel like they are finished with a specific chore, they come tell me, I ask them if they have reviewed the list, then I check their work. This has cut WAY down on the nagging and helps them to feel less overwhelmed by the tasks at hand. Here's my checklist of how to thoroughly clean a living or family room. This is one of our Saturday chores. (You may have to alter this list depending on the age of your children)

Step 1: Pick up everything off the floor and carpet and put it in its home. (That means we moms have to teach kids where every object's home is!)


Step 2: Check coffee table, sofa table, end tables, TV console and piano for any objects that need to be put in their proper homes. Put them in their proper homes.


Step 3: Dust all furniture and objects. (It helps to declutter before assigning this chore to children so as not to overwhelm them.) Start from the top and work your way down.

Step 4: If there are spills on any hard furnishings, such as the coffee table, wipe these up with a damp rag.


Step 5: Sweep floor area, including corners and under furniture.


(I have no idea why that broom was so huge.)

Step 6: Vacuum carpet area. When you are finished with the main areas, use the tube attachments to get the corners, under the couches, coffee table, TV console, end tables and sofa table.

Step 7: Mop the floor.

Step 8: Stand in the entrance of the room and look around to make sure you didn't miss anything. Admire your work (so you can stand tall like this man) and come tell me you're finished!

THANK YOU!!